Cerwyn
Cerwyn (Site Admin)
")

Number of posts : 11073
Age : 65
Location / Country : North Wales
Registration date : 2008-07-20
 | Subject: STEN MkII (MGCUK's) Steel Version... Basic Reassembly Guide  Mon Aug 04, 2008 5:29 pm Mon Aug 04, 2008 5:29 pm | |
| Basic Re-assembly Guide... STEN MkII MGCUK Steel version
The STEN is a very simple and easy gun to strip, dismantle and re assemble Just like its real life counterpart, it was designed as a solid and reliable weapon produced with as few component parts as possible.
It can be taken apart and maintained by a soldier or partisan in the field with the minimum of tools.
In fact, the STEN Gun only requires one single Allen Key for re-assembly after a Field Strip.
If the Trigger Mechanism needs attention then the Guard then a flat blade screwdriver will be required.
Field Stripping and Cleaning are covered in seperate Step by Step Guides so this guide begins with your STEN Gun already stripped into its component parts, cleaned and lubricated.
Inspection of parts for damage will be dealt with in a separate Guide.
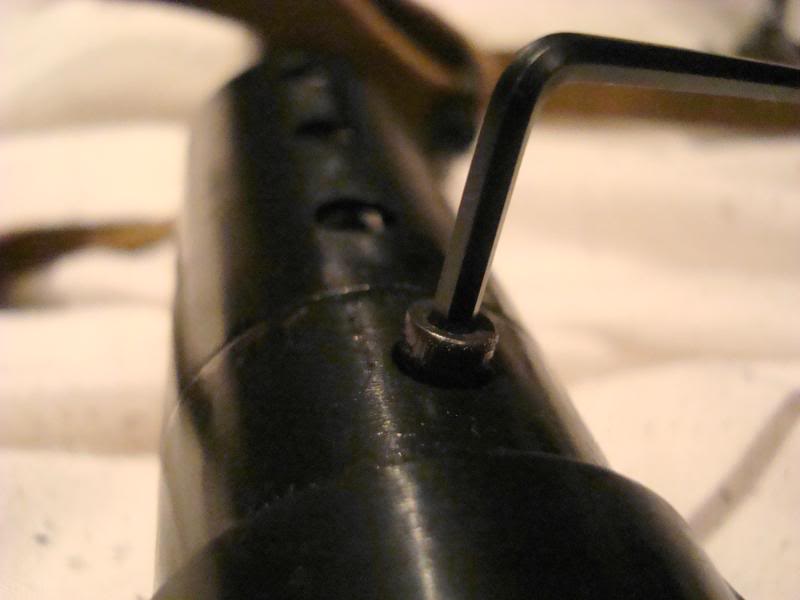
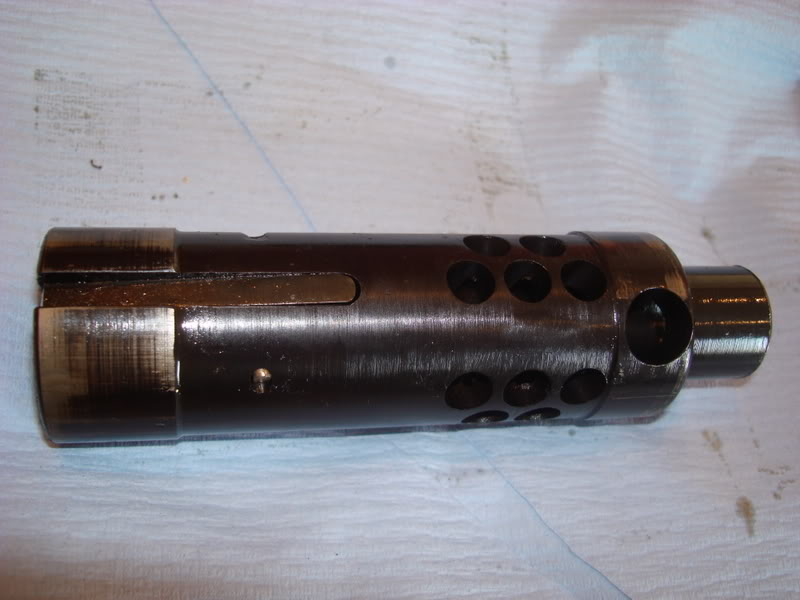
Step 1. Detonator Pin and Chamber.
 
The metal Detonator Chamber and its integral Pin is secured by a grub screw in the Receiver
Make sure that the housing is clean and free from obstruction...
I usually spray a little Gun Oil into the housing and onto the Chamber before inserting
Position the Chamber squarely into the housing and press it home by hand. It should slide in easily.
Any resistance will be due to the chamber not entering squarely or possibly burrs on the housings' edges
Looking through the grubscrew's hole, line up the groove cut in the Chamber's outside diameter with the hole...
Then secure it in place with the grubscrew
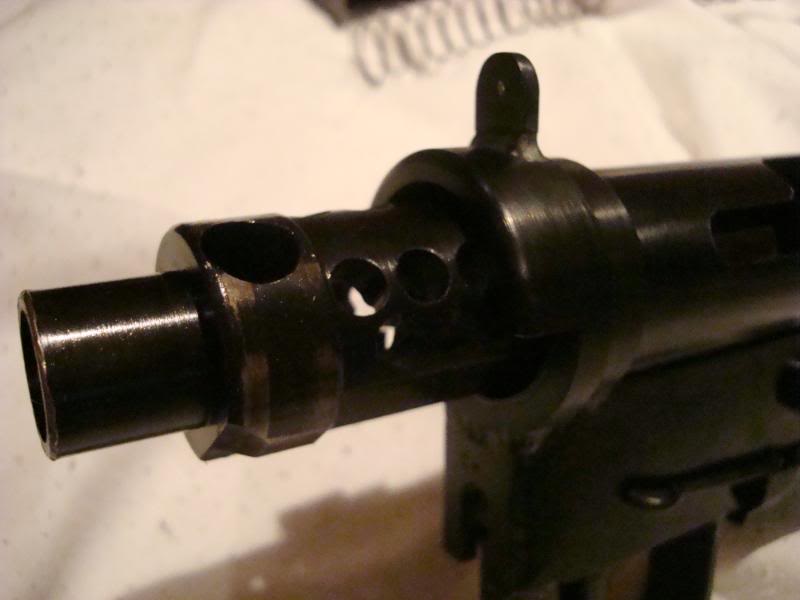
Step 2. Barrel and Shroud
Position the Barrel and Shroud assembly onto the end of the receiver and screw it firmy into place with the three socket head screws
Step 3. Fitting the Bolt
Again I usually spray Gun Oil inside the Receiver and all over the Bolt before fitting.
It may be that I'm over zealous with oiling but as this gun is made of steel I'd rather over oil it than see it rusty! I wipe away excess oil before firing anyway... 
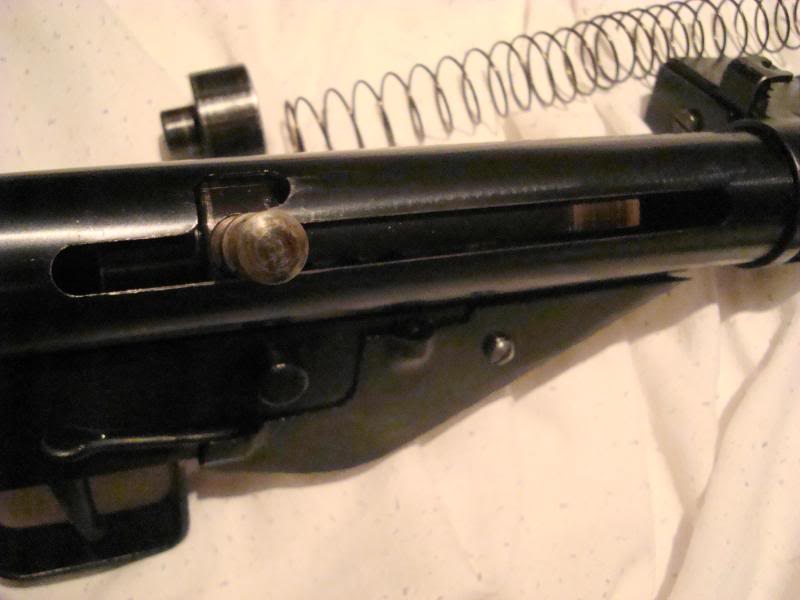
The Cocking Handle locates the Bolt too, and is a simple push fit into the Bolt.
Slide the Bolt into the receiver, lining up the larger diameter hole for the Cocking Handle as near to the line of the Handle Slot as possible...
The bolt may need a little turning to enter properly.
Squeeze the trigger to allow the Bolt to pass over the sear
Note that the Cocking Handle has a machined groove which sets the correct depth when inserted...
Align the large hole with the Safety notch in the receiver slot
Push the Handle into the Bolt ensuring you don't go in too deep. The Handle's "shoulder" must sit outside the Receiver slot.
Push this in too far and the Handle will jam in the receiver.
Now the Cocking Handle's in, push the Bolt all the way forwards
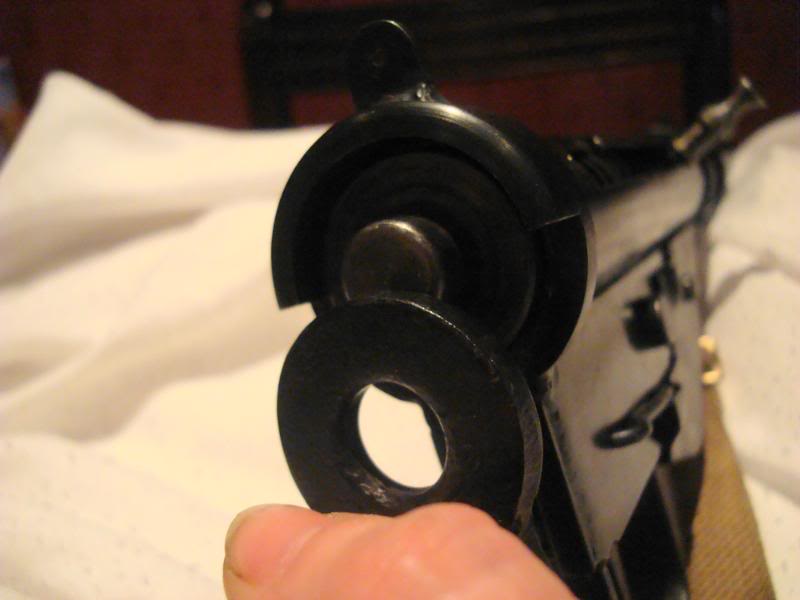
Insert the Recoil Spring and then place the End Cap over the spring.
To secure everything, the Stock needs to be slotted into place
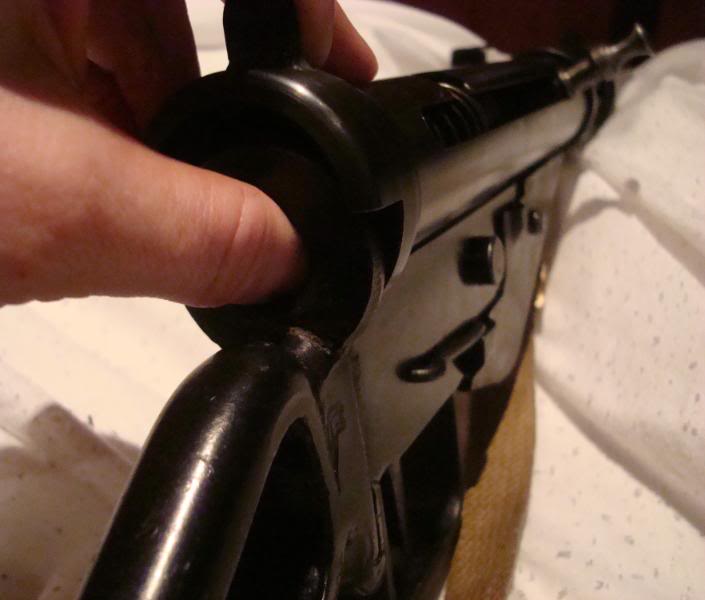
Pushing the End Cap into the Receiver Tube against Recoil Spring Pressure, slide the Stock upwards, making sure the Tang fits into the slot, and that the End Cap's "Button" slots through the hole in the Stock's end plate.
If the End Cap doesn't quite slot through, pushing it in a little more with your finger or thumb will line it up, or, failing that, it'll most likely slot through when you Cock the Bolt.
Next step is to check the Bolt moves freely, so pull the Cocking Handle and Cock the Bolt. Ut should slide freely without snaggung or tightening anywhere.
Grab the Cocking Handle, squeeze the trigger and guide the bolt forwards again by hand.
Avoid allowing the Bolt to slam forwards by spring pressure unless firing the gun as this may cause damage
Set the Fire Select Switch in Automatic then whilst squeezing the trigger pull the Bolt back and forth along the Receiver Tube to check free movement. This also spreads the Oil throughout the mechanism too.
Check Single Shot settings by selecting Semi Auto, Cock the Bolt, then grasp the Cocking Handle.
Squeeze the trigger guiding the Bolt forwards by hand.
Still squeezing the trigger, pull the Bolt back again.
It should Cock itself and not move forwards again until you first release, then re-squeeze the trigger.
All that's left now is to load the magazine, insert it and you're ready to fire.
If you intend storing your STEN after cleaning, ALWAYS remove the Recoil Spring.
Do NOT store your gun with the Spring under any tension.
Enough pessure is applied to the spring even when the Bolt is forward and closed to render the Spring coil bound if left for long periods.
The 2 springs in this photo show the difference in overal length caused by the upper spring being left in the gun during storage
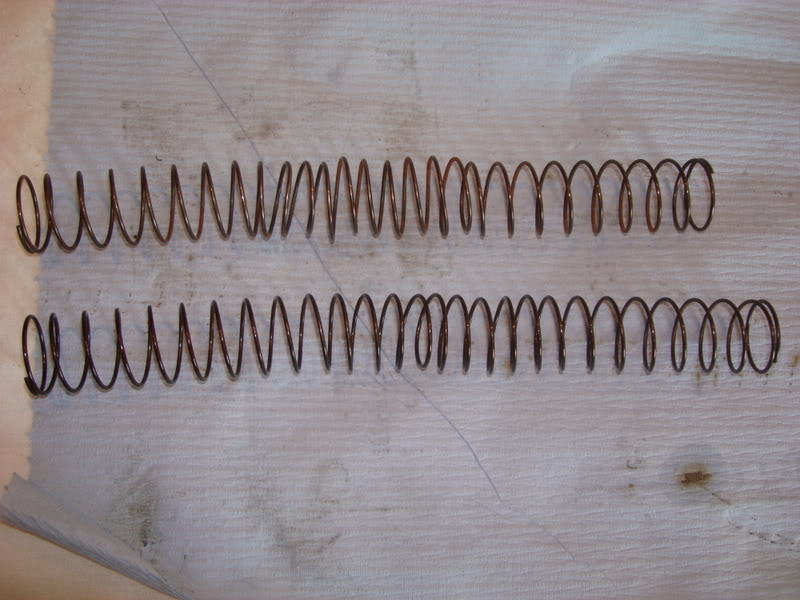
Loss of length and tension rendered this spring incapable of stripping cartridges from the magazine which meant it wouldn't fire at all.
Ref:http://www.mp40modelguns.com/forum2/viewtopic.php?t=1450Claymore's Superb Review "Steel Sten"
Ref:http://www.mp40modelguns.com/forum2/viewtopic.php?t=2457 Basic Strip Down
Ref:http://www.mp40modelguns.com/forum2/viewtopic.php?t=2293 Cleaning & Prep Cartridges
Ref: Loading MGC Cartridges
Ref:STEN MkII Video
Cerwyn
Last edited by Cerwyn on Mon Nov 06, 2017 5:36 pm; edited 1 time in total (Reason for editing : images converted to servimg) | |
|
Cerwyn
Cerwyn (Site Admin)
Number of posts : 11073
Age : 65
Location / Country : North Wales
Registration date : 2008-07-20
| | Subject: Re: STEN MkII (MGCUK's) Steel Version... Basic Reassembly Guide Mon Nov 06, 2017 5:38 pm | |
| Photos reposted with servimg
_________________
Cerwyn
Hobby collector of Replica model guns and Militaria.
also member of Living History Reenactment Groups.
| |
|