Cerwyn
Cerwyn (Site Admin)
")

Number of posts : 11075
Age : 65
Location / Country : North Wales
Registration date : 2008-07-20
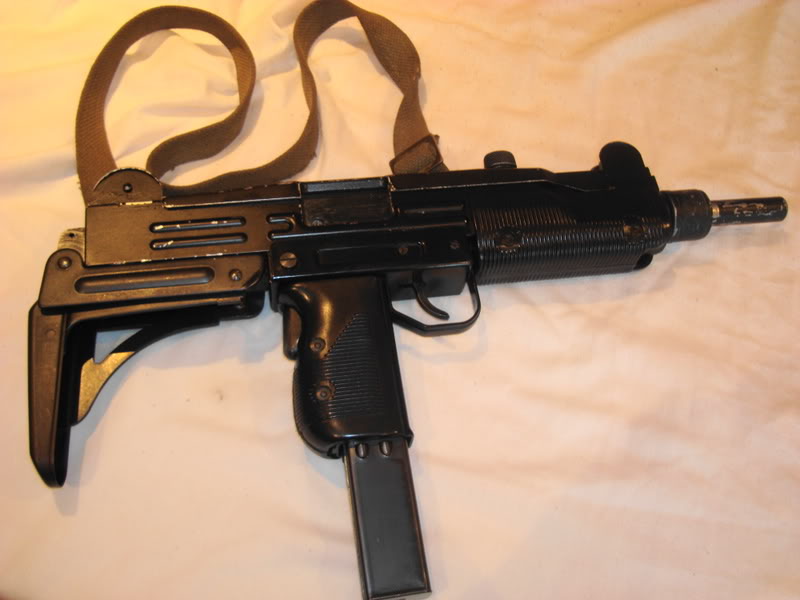
 | Subject: Marushin UZI ... Basic Parts Inspection Guide  Mon Sep 29, 2008 11:14 am Mon Sep 29, 2008 11:14 am | |
| Basic Parts Inspection Guide... Marushin UZI***UNDER CONSTRUCTION***Field Stripping, Cleaning, Reassembly have already been covered in previous Step by Step Guides so this guide begins with your UZI already stripped into its component parts.
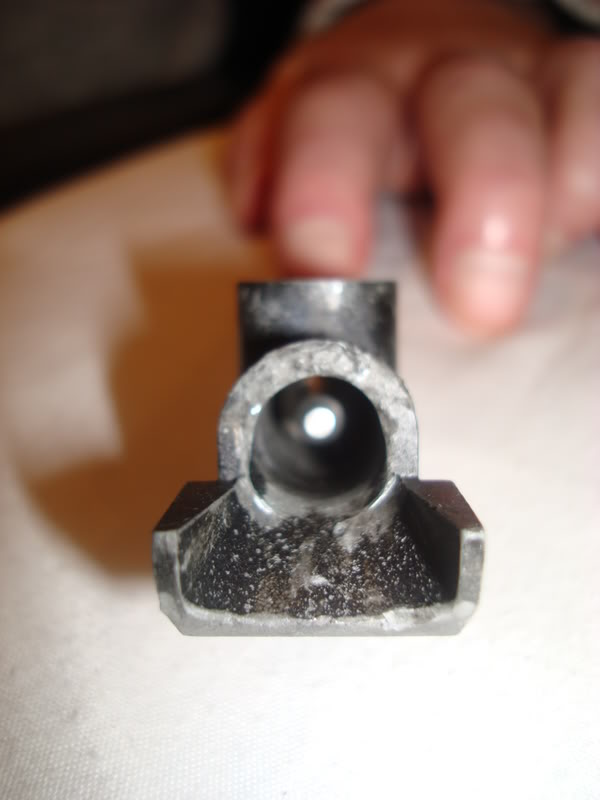
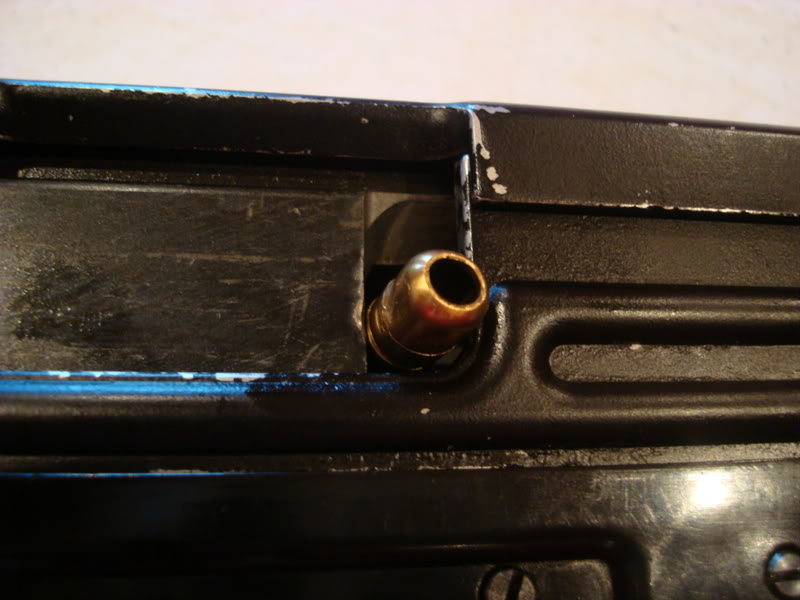
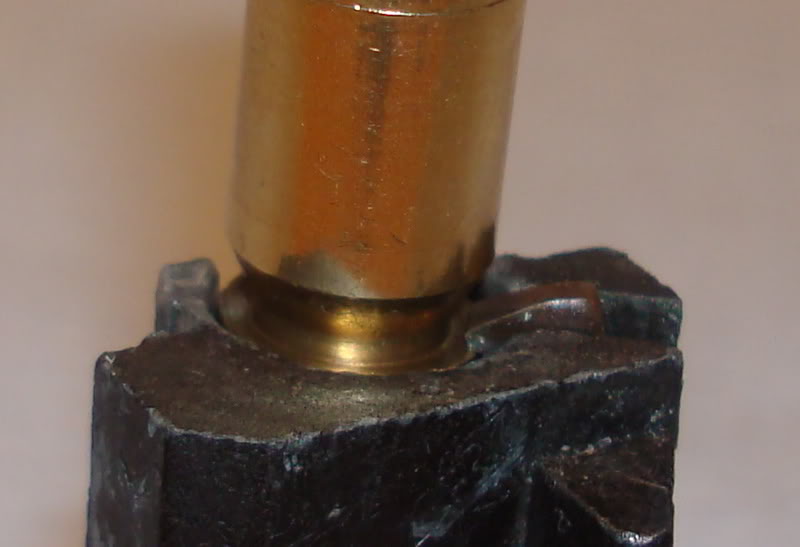
[size-=14]. Detonator Pin and Chamber.[/size] The metal Detonator Pin can be prone to corrosion damage and occasionally being knocked out of shape by miss fed cartridges.
Light corrosion can be removed with Wire Wool and / or Emery paper (Wet’n’\Dry)
The Chamber is die cast zinc alloy and not particularly strong. It is prone to heavy corrosion if not cleaned thoroughly after every firing session and can break if struck or otherwise miss-handled.
Check the chamber casting looking for cracks or any other sign of damage.
Check the entrance into the Chamber for damage.
Any rough edges here might interfere with your cartridges feeding into place. Any light nicks, burrs or corrosion can be carefully smoothed out by some abrasive paper.
Check the inside of the chamber for dirt and deposits. Build up of dirt or gummed up old oil will cause cartridges to stick and jam inside
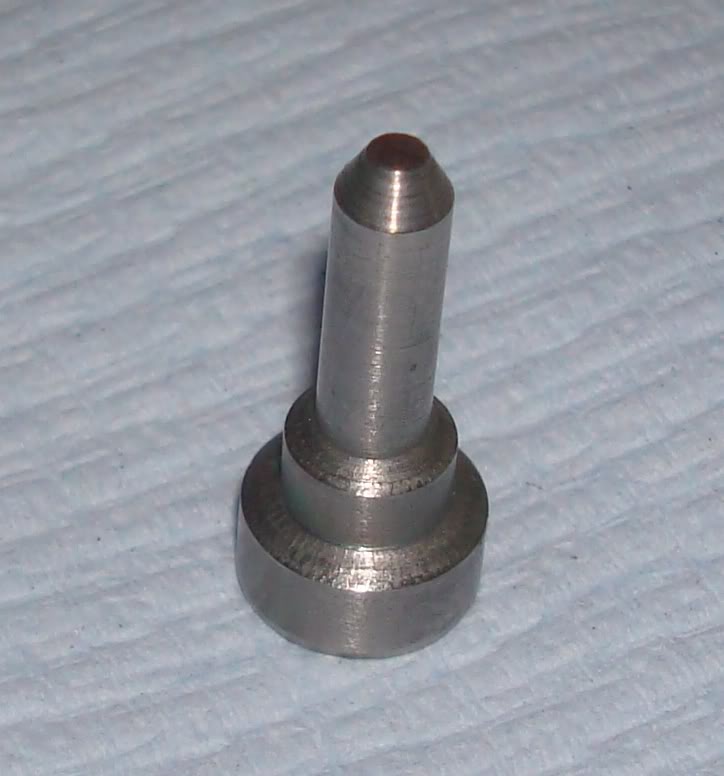
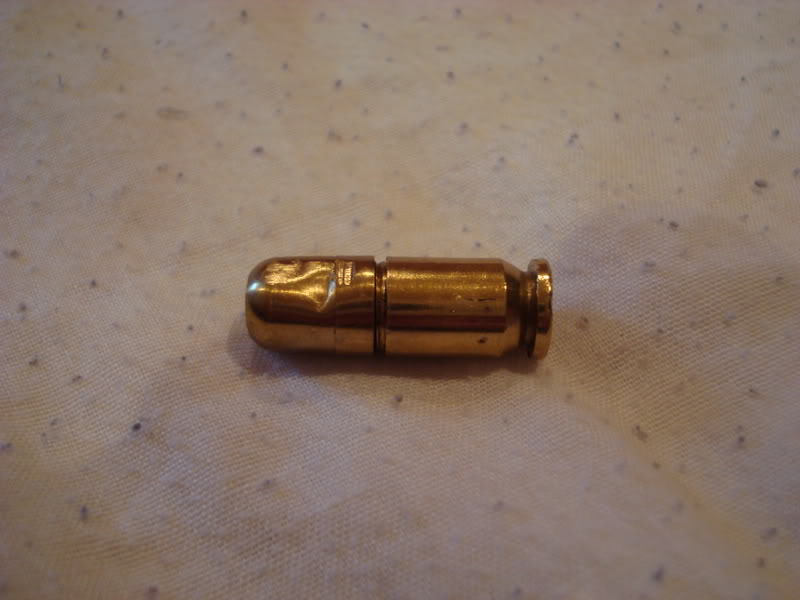
Marushin UZI Detonator Pin Custom UZI Detonator for MGC P220 Cartridge
Det.Pins must be clean and fastened tightly in the Chamber.
2. Bolt and Extractor
Bolt condition is vital to the firing performance of your model gun.
Starting at the bolt face, this photo shows a used (zinc alloy)and a new (steel)example for comparison.
See photo...
At first glance, there does not appear to very much wear or damage to the zinc bolt, but a closer look shows that the rim of the bolt face that holds the cartridge rim firmly in place has been peened over. This is wear resulting from firing. The rim has struck cartridges repeatedly enough times to wear out.
This bolt is worn enough to render the UZI practically useless. At best it would manage to fire 3 or 4 rounds in Automatic but the gun would jam continuously.
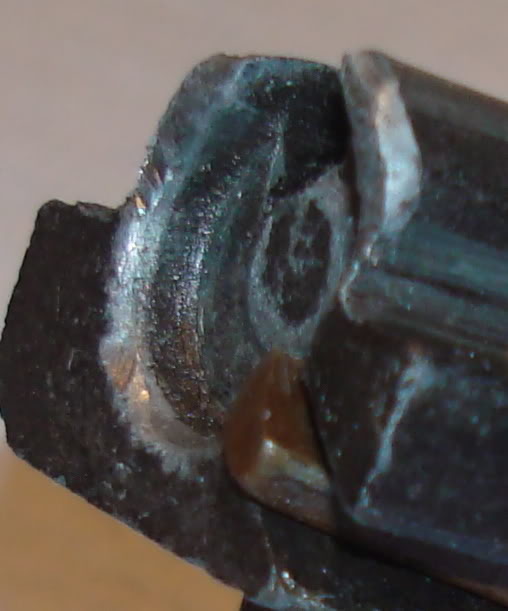
Look carefully at the new custom made steel bolt. The Rim is well defined and deep enough to hold the cartridge securely.
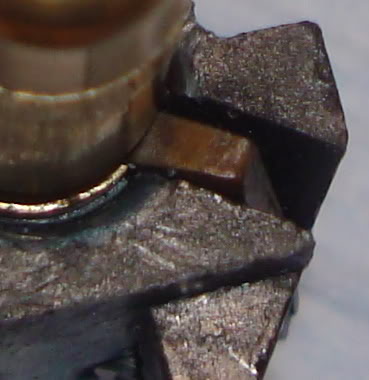
Custom Steel UZI Bolt and Extractor made by 8ace...
The Bolt strips each round from the magazine as it travels forwards. The rim seen here, scoops the round up and pushes it forwards towards the Detonator Chamber.
As this is the first point of contact, any wear or chips to the rim can result in miss feeds and a non firing gun.
The round is pushed home into the Detonator Chamber and its’ rim settles in the circular recess in the Bolt Face Centre.
These photos show how the round is held. You can see the two means of securing the round…
i.e. Circular Recess and the Extractor Claw
Any wear or chips to the recess edges can result in cartridges dropping off the bolt prematurely. If either of these 2 are damaged the cartridge will more than likely drop off the bolt. Generally this results in rounds firing, but failing to extract and eject cleanly from the chamber and port.
The extractor claw is spring loaded and clips over the cartridge rim to hold it securely.
Check that the Extractor pivots smoothly against spring pressure…
Check the extractor’s claw for dents or chips. Any slight dents can be cleaned up by careful use of a fine file. Aim to get a sharp and even edge to the claw.
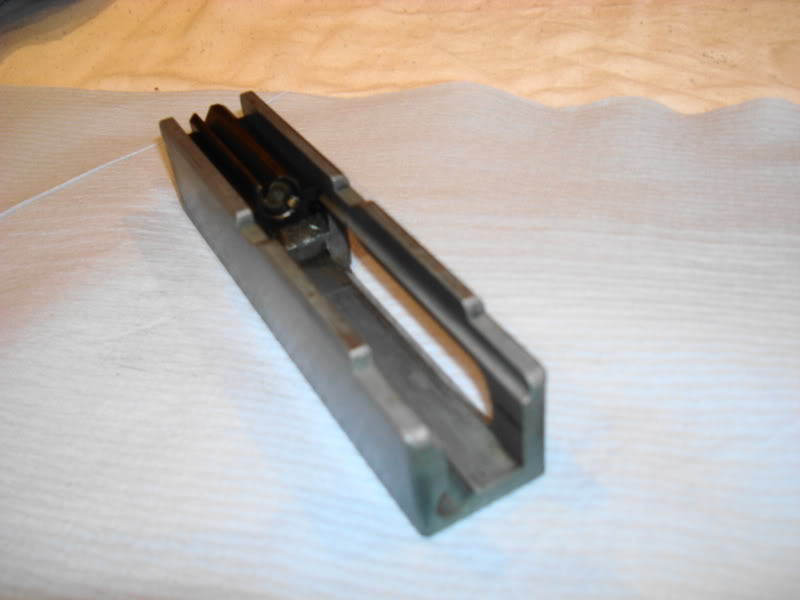
3. Bolt Carrier.
The Bolt Carrier is a die cast zinc alloy component. The bolt fits into its slot underneath the carrier, located by a "hook" cast onto the bolt and a single socket head screw.
This is the "hook"
Check for cracks or any other damage. Check the area securing the Bolt, particularly around the holes that the lock screw and the bolt's "hook" pass through.
My own UZI suffers from the ocassional "stove-pipe" jam. A fired cartridge will get caught between the Bolt Carrier's opening and the Receiver's Ejection Port. Basically the cartridge hasn't been thrown clear after extraction & ejection and been pinched by the Bolt Carrier as it returns forwards to fire again.
The Bolt Carrier hits the cartridges hard enough to dent them. Sometimes damage is so bad it's impossible to unscrew the cartridge apart.
There is a risk then that the Bolt Carrier and Receiver can sustain damage too so check these areas for dents or cracks...
 [
Check also the Running edges of the Carrier. Notches here locate on the trigger's sears to Cock and fire in either Semi or Full Auto. Look for cracks, dents or rough patches.

4. Cocking Handle

Unlike most types of sub-machine gun the UZI's cocking handle is not secured to or part of the Bolt.
It's located on the Top Plate and slides along grooves held in place by a spring.
Check the cocking handle for smooth and easy movement.
4. Trigger and Sear.
See photo...
The Sear moves down into the Lower Receiver when the trigger is squeezed. Ensure it drops into it’s recess cleanly and that it returns smoothly when the trigger is released. Problems here may lead to the gun firing accidentally and uncontrollably or the bolt refusing to move forward when the trigger is pulled.
Ref: https://mp40modelguns.forumotion.net/modelgun-stripping-and-rebuild-guides-f12/marushin-uzi-basic-strip-down-guide-t14.htm Basic Strip Down
Ref: https://mp40modelguns.forumotion.net/modelgun-stripping-and-rebuild-guides-f12/marushin-uzi-basic-reassembly-guide-t15.htm Basic Reassembly
Ref: https://mp40modelguns.forumotion.net/beginner-s-guides-tocartridges-f15/loading-marushin-9mm-mp40-uzi-cartridges-t922.htm Loading Marushin 9mm Cartridges
Ref https://mp40modelguns.forumotion.net/beginner-s-guides-tocartridges-f15/loading-mgc-type-cartridges-t924.htm: Loading MGC c.p. type Cartridges
Ref: Basic Parts Inspection Guide
Ref https://mp40modelguns.forumotion.net/modelgun-cleaning-guides-f11/marushin-uzi-basic-clean-lubrication-guide-t34.htm Cleaning & Lubrication Guide
Cerwyn[/center]
Last edited by Cerwyn on Tue Nov 07, 2017 12:24 pm; edited 14 times in total (Reason for editing : Images updated to Servimg & Photos added) | |
|
Cerwyn
Cerwyn (Site Admin)
Number of posts : 11075
Age : 65
Location / Country : North Wales
Registration date : 2008-07-20
| | Subject: Re: Marushin UZI ... Basic Parts Inspection Guide Mon Jun 08, 2009 6:30 pm | |
| Updated...
_________________
Cerwyn
Hobby collector of Replica model guns and Militaria.
also member of Living History Reenactment Groups.
| |
|