Cerwyn
Cerwyn (Site Admin)
")

Number of posts : 11090
Age : 65
Location / Country : North Wales
Registration date : 2008-07-20
 | Subject: Hudson PPSh41... Basic Reassembly Guide  Mon Aug 04, 2008 5:55 pm Mon Aug 04, 2008 5:55 pm | |
| Basic Re assembly Guide... Hudson PPSh41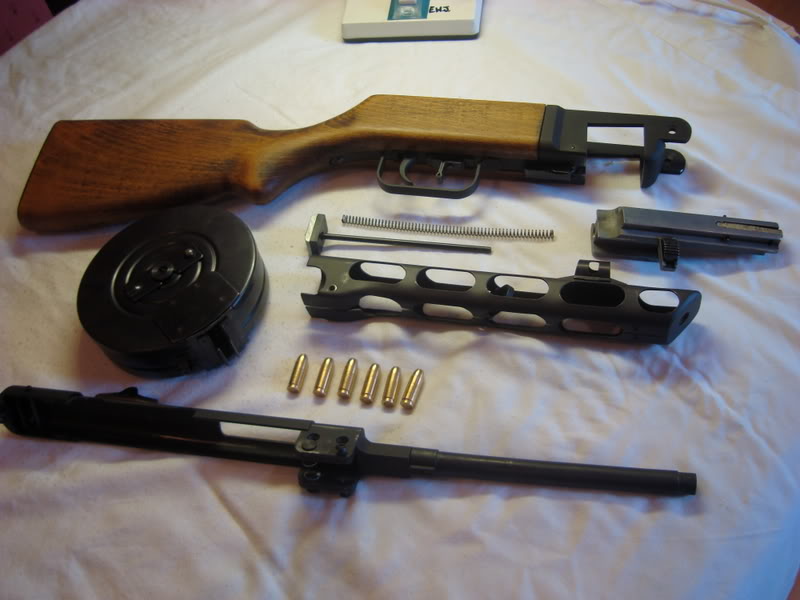 Hudson’s PPSh41 is a very simple and easy gun to strip, dismantle and maintain. Just like its real life counterpart, it was designed to be a solid and reliable weapon capable of being taken apart and maintained by a soldier in the field with the minimum of tools. Hudson’s PPSh41 is a very simple and easy gun to strip, dismantle and maintain. Just like its real life counterpart, it was designed to be a solid and reliable weapon capable of being taken apart and maintained by a soldier in the field with the minimum of tools.
Field Stripping, Cleaning and Inspection have already been covered in separate Step by Step Guides so this guide begins with your PPSh41 already stripped into its component parts.
Step 1. Detonator Pin and Chamber.
The metal Detonator Pin is secured by a screw into the metal Detonator Chamber. 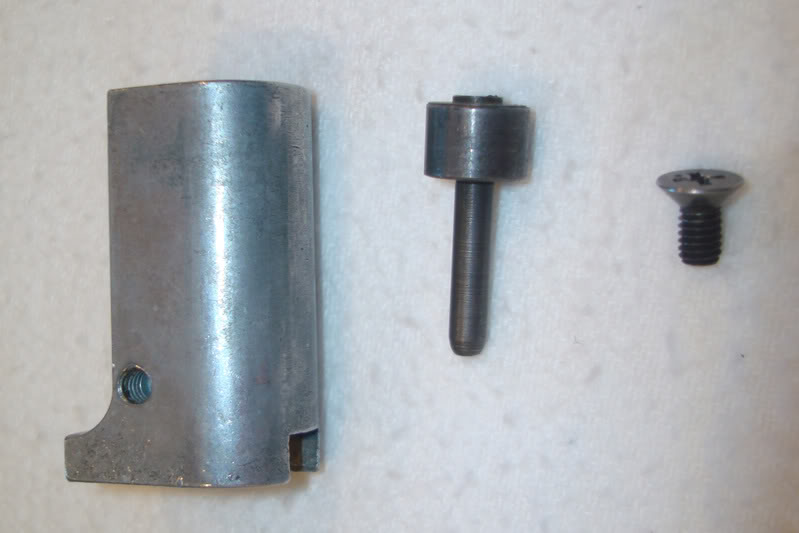 A light spray with WD40 or Silicone Oil will protect both Pin and Chamber. A light spray with WD40 or Silicone Oil will protect both Pin and Chamber.
Simply push the pin back into the chamber to locate, thread the cross-head screw in place from the rear and tighten.  Push the Chamber into position and secure it with the two cross-head screws. Push the Chamber into position and secure it with the two cross-head screws.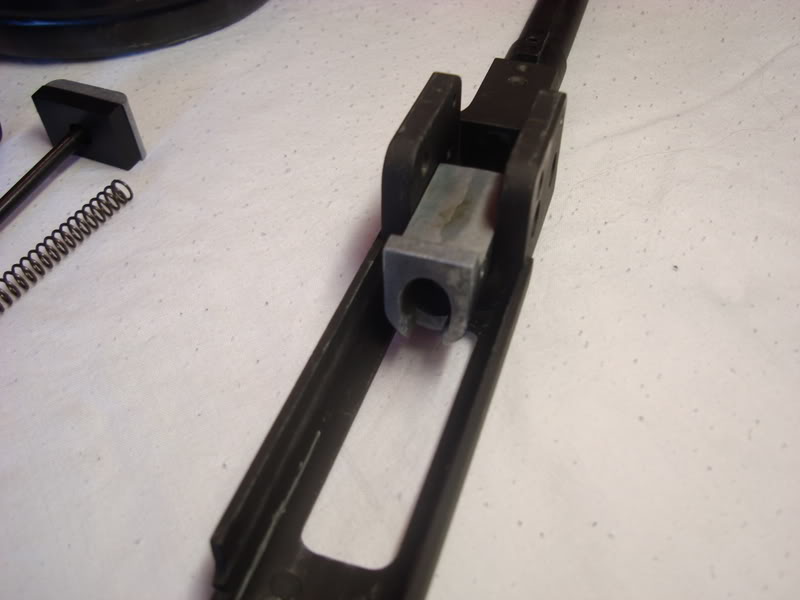  Step 2. Attaching the Barrel to the Stock assembly. Step 2. Attaching the Barrel to the Stock assembly.
Simply align both holes in the barrel assembly with the corresponding holes in the stock assembly. Lightly coat the pins with grease, then push the pins through to locate, then push the Spring Clips into place to lock.
The spring clips on my PPSh are not particulary strong and will push on and off without difficulty. 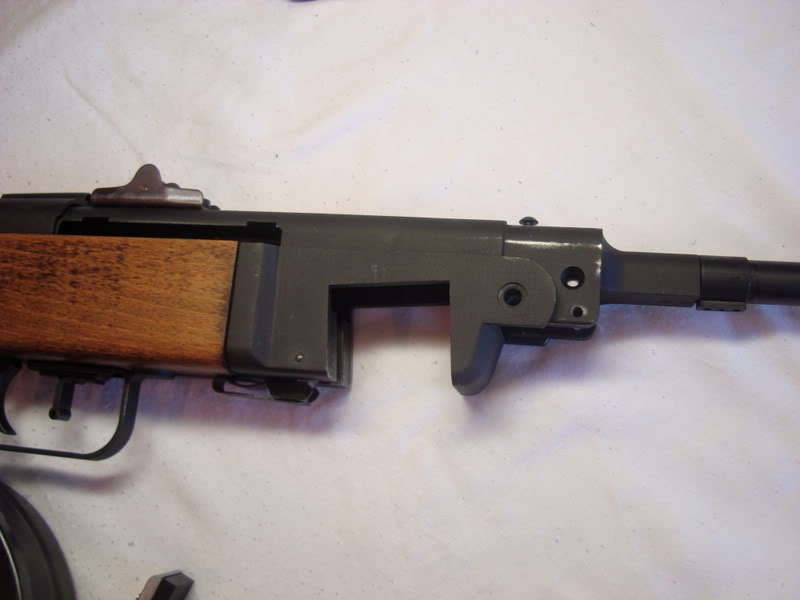 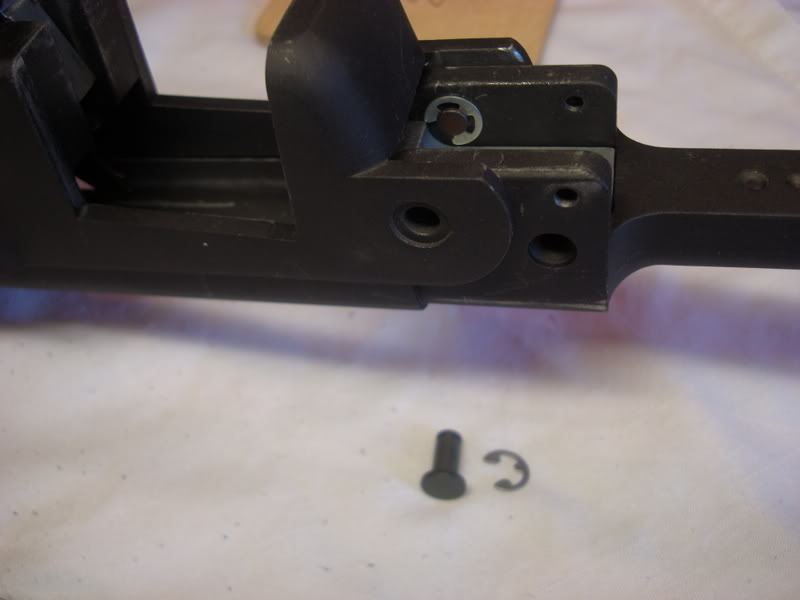   Step 3. Barrel Shroud. Step 3. Barrel Shroud.
Slip the shroud over the barrel, ensuring the front sling loop is positioned correctly. Push the shroud fully home, then secure it with the three socket head screws…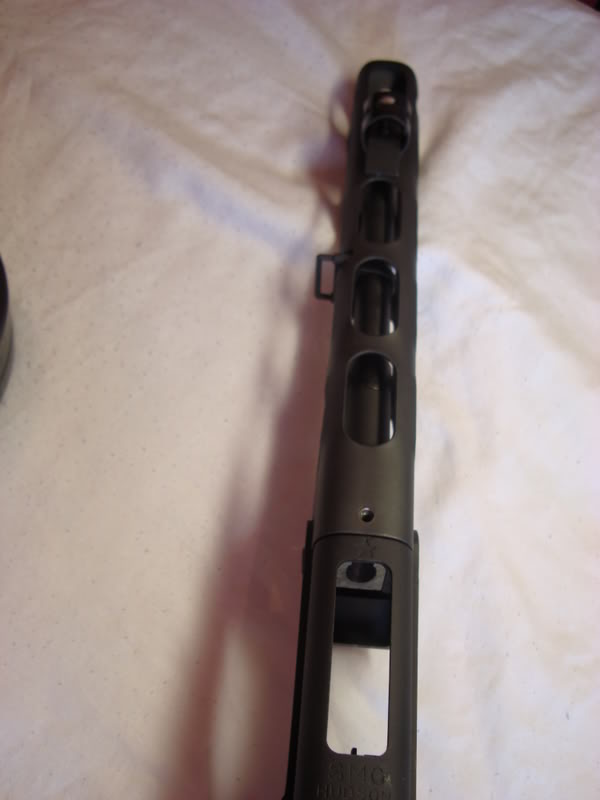 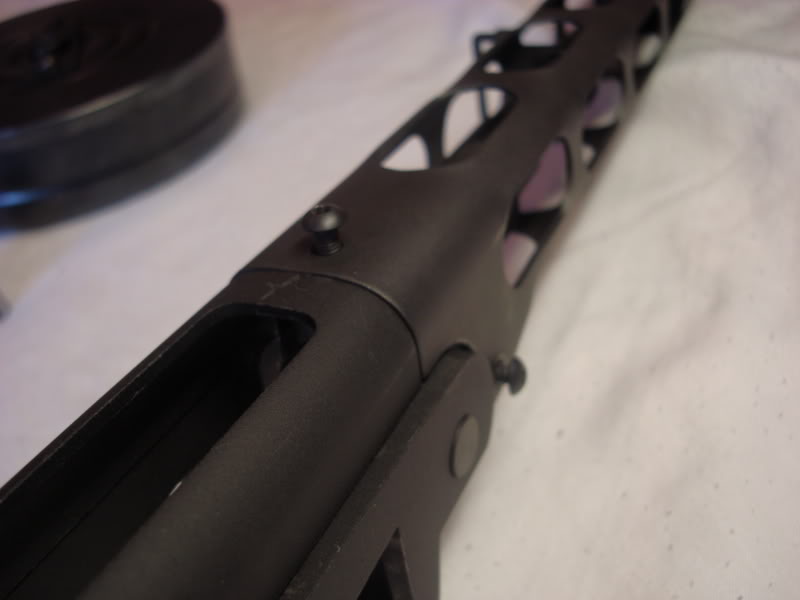 Step 4. Bolt, Recoil Spring and Guide Step 4. Bolt, Recoil Spring and Guide
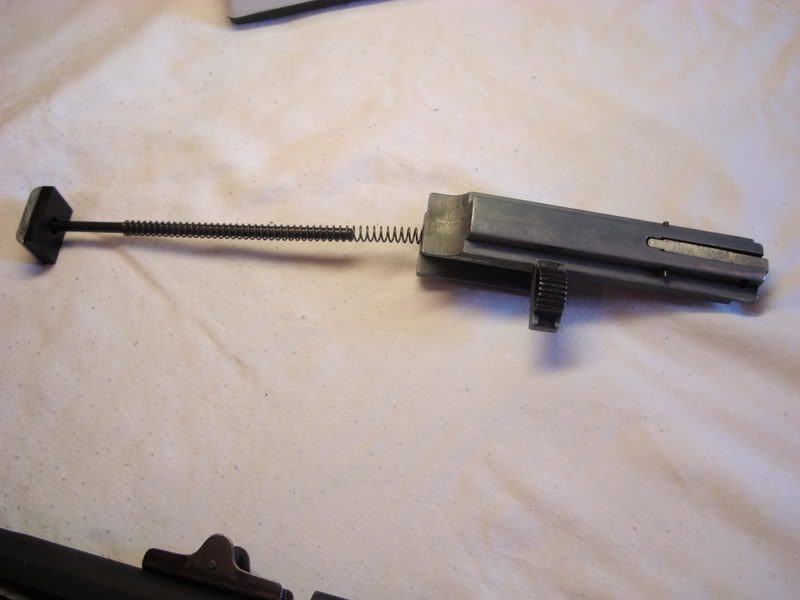
Tilt the barrel forwards to open the receiver fully. Thread the recoil spring onto its guide rod, then into the hole in the rear of the bolt.
Locate the Guide Rod’s buffer plate into position at the back of the receiver. Ensure the buffer plate is threaded all the way onto the rod and sits flush as per the photo…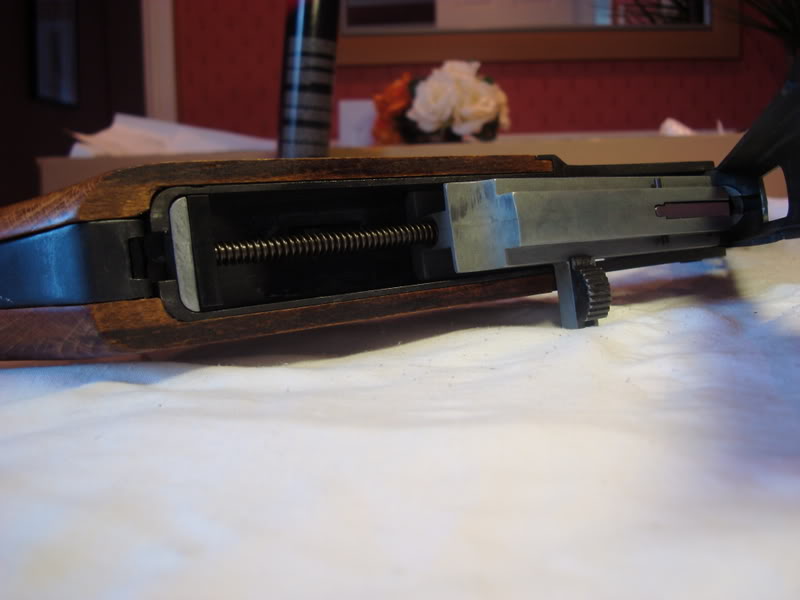 Pull the bolt back against the spring and position it into the receiver. Pull the bolt back against the spring and position it into the receiver.
The only component that may interfere with the bolt is the ejector… just make sure it fits into the slot cast in the bottom of the bolt…

Step 5. Closing the Receiver
Swing the Barrel assembly back over the bolt to close and lock into place. Push the end plate forwards to allow the barrel assembly to close correctly then release it to lock.

Always check that the Safety Catch on the bolt’s cocking lever is in the “Fire” position (see photo below) at this point otherwise it will jam in the slot 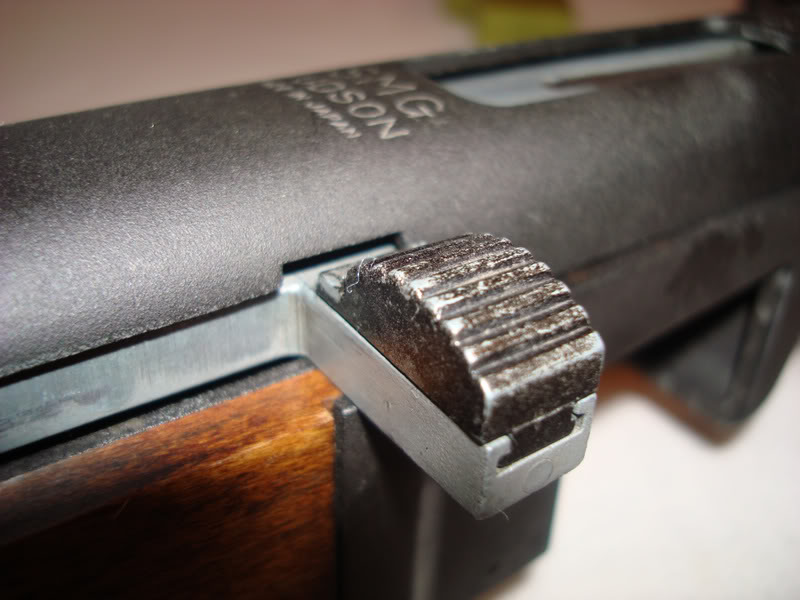 This photo shows Safety ON This photo shows Safety ON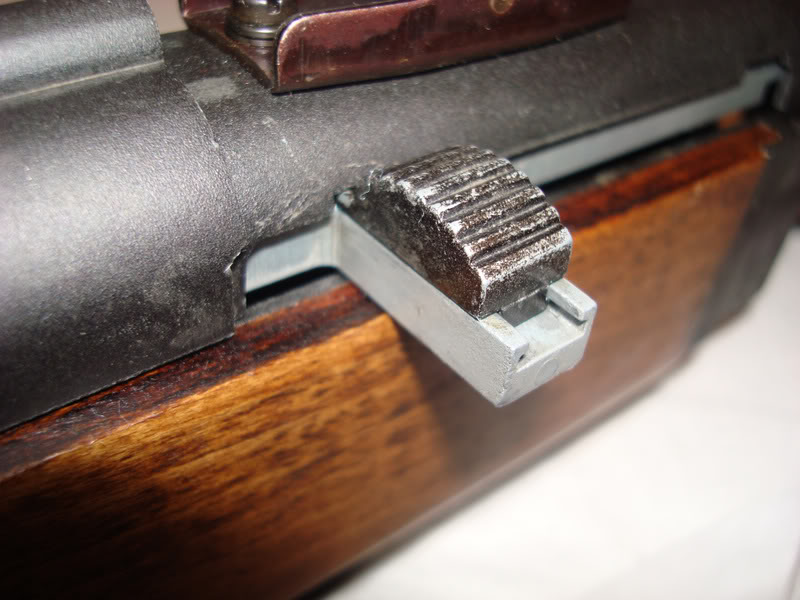 Before going any further, pull the cocking lever back to check it operates properly, squeeze the trigger and check free movement of the bolt within the receiver. Before going any further, pull the cocking lever back to check it operates properly, squeeze the trigger and check free movement of the bolt within the receiver.
Step 6. And finally…
Wipe your PPSh41 down with a soft oily rag to get rid of any excess oil and finger prints.
Ref: Stripdown
Ref: https://mp40modelguns.forumotion.net/modelgun-cleaning-guides-f11/hudson-ppsh41-basic-cleaning-inspection-guide-t37.htmCleaning & Inspection
Ref: Troubleshooting
Ref: Tuning Tips
Ref: Loading Hudson Cartridges
Ref: Cleaning & Preparing Cartridges Cerwyn
Last edited by Cerwyn on Mon Jul 31, 2017 12:38 pm; edited 6 times in total (Reason for editing : images converted to servimg) | |
|
Cerwyn
Cerwyn (Site Admin)
Number of posts : 11090
Age : 65
Location / Country : North Wales
Registration date : 2008-07-20
| | Subject: Re: Hudson PPSh41... Basic Reassembly Guide Mon Aug 04, 2008 6:03 pm | |
| ***Posted By shazhib***
mate,
One small suggestion.
Ideally, use "lock-tite" kind of product to apply det-screw. PPSH and Thompson (Hudson) has very short screw, may loosen after several fire. That may end up jamming.
thanks,
S | |
|
Cerwyn
Cerwyn (Site Admin)
Number of posts : 11090
Age : 65
Location / Country : North Wales
Registration date : 2008-07-20
| | Subject: Re: Hudson PPSh41... Basic Reassembly Guide Mon Aug 04, 2008 6:03 pm | |
| - shazhib wrote:
- mate,
One small suggestion.
Ideally, use "lock-tite" kind of product to apply det-screw. PPSH and Thompson (Hudson) has very short screw, may loosen after several fire. That may end up jamming.
thanks,
S Thank You shazhib!  This is EXACTLY the kind of response and discussion I was hoping to see following on from the first Guide! I am in the middle of writing the PPSh41 Tuning Tips Guide... would you mind if I included your Loc-Tite tip in that? Cerwyn | |
|
Sponsored content
| | Subject: Re: Hudson PPSh41... Basic Reassembly Guide | |
| |
|
